Configuration of Graphical Installer Wizard (Inno
Script Studio)
|
Graphical Installer Wizard is user friendly
tool for creating skinned Graphical Installer Powered Installers.
If you installed Graphical Installer Wizard with automated
installer then it should be configured correctly. Otherwise do
following steps:
Part A - Installation check
-
A. Open Inno Script Studio (from Start menu of by
doubleclicking on it's icon located on your desktop).
-
B. In main menu in Tools submenu you can see a new item –
Graphical Installer. Click it and you see six sub-items.

If you can see this menu then Graphical Installer Wizard was
installed correctly and you can go to step 3 Configure and then Launch the Graphical Installer
Wizard.
Troubleshooting:
- If you cannot see the Graphical Installer Wizard menu from
picture above then please check your Inno Script Studio
installation directory (Inno Script Studio\Plugins) for
presence of file ISS_GraphicalInstallerWizard.dll.
- Plug-in is being copied here during the setup process of
Graphical Installer. Make a sure you checked it during installation
of Graphical Installer.

- If everything went correctly then you can see this file in Inno
Script Studio Options dialog: Launch Inno Script Studio and click
Tools -> Options to show this dialog, then click Plugins in left
tree.

- If you still cannot see it please do the Manual installation and start Part A
again.
Part B - Configuration of plug-in
Tip:
You need to do this whole procedure only once - when launching the
Wizard for the very first time. For next time the settings are
remembered in .ini file.
-
1. Open Inno Script Studio if you have closed it.
-
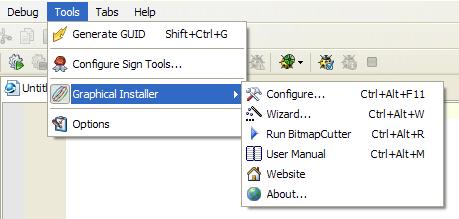
2. In main menu, in Tools submenu you can see a new item
– Graphical Installer. Click it and you see six
sub-items.

-
3. Click Configure item (or press
Ctrl+Alt+F11).
Tip:
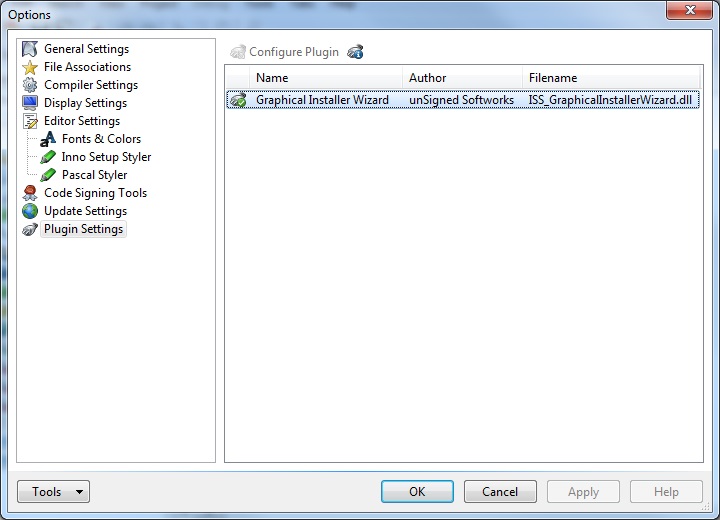
If you had Inno Script Studio already installed, everything is set
automatically during the setup process, so all you need is to check
whether paths are correct.
-
4. Configuration dialog is shown.

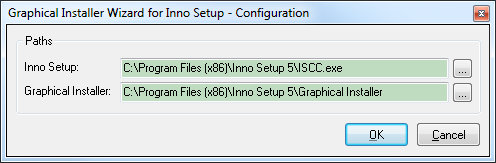
If shown paths are correct go to point 6. Otherwise continue
with next point.
-
5. Click the button Browse and select appropriate files:
- For Compiler option browse to Inno Setup directory and
select ISCC.exe
- For Graphical Installer option browse to Inno Setup\Graphical
Installer directory and select
GraphicalInstaller_projects.nsh
-
6. When done click OK to save changes. Graphical
Installer Wizard is now configured.
Warning:
If you reinstall Inno Setup or move it to other directory you need
to update these settings. If something goes wrong the Wizard dialog
will show an error message to inform you to change settings.
Now you can continue with Launching a Graphical Installer
Wizard.
|